
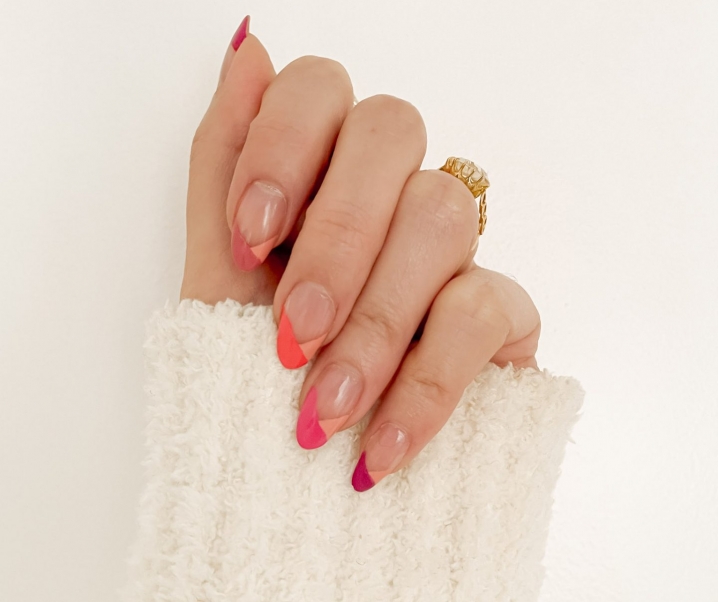
 I’m all about easy nail art! So when I bought this gold metallic sharpie, labelling boxes wasn’t what I had in mind for it.
It’s much easier to draw cute designs on your nails with a sharpie than paint with a teeny brush. So just doodle away, and if you make a mistake, a little bit of good ‘ol rubbing alcohol and it will come right off without taking off your nail polish.
Once you’re done with your design, finish your sharpie nail art with a top coat. My personal fave top coat is Seche Vite Dry Fast Top Nail Coat
I’m all about easy nail art! So when I bought this gold metallic sharpie, labelling boxes wasn’t what I had in mind for it.
It’s much easier to draw cute designs on your nails with a sharpie than paint with a teeny brush. So just doodle away, and if you make a mistake, a little bit of good ‘ol rubbing alcohol and it will come right off without taking off your nail polish.
Once you’re done with your design, finish your sharpie nail art with a top coat. My personal fave top coat is Seche Vite Dry Fast Top Nail Coat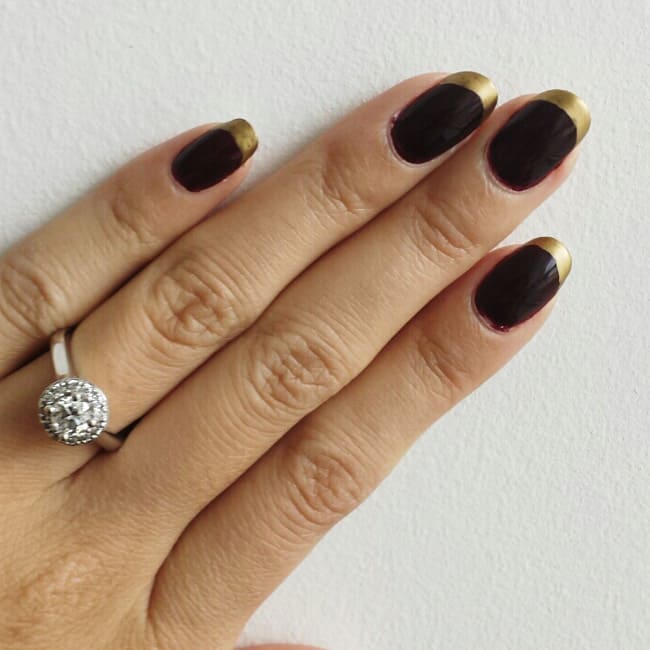
- Start at the edge of the nail and work backwards with your sharpie until you find the perfect width.
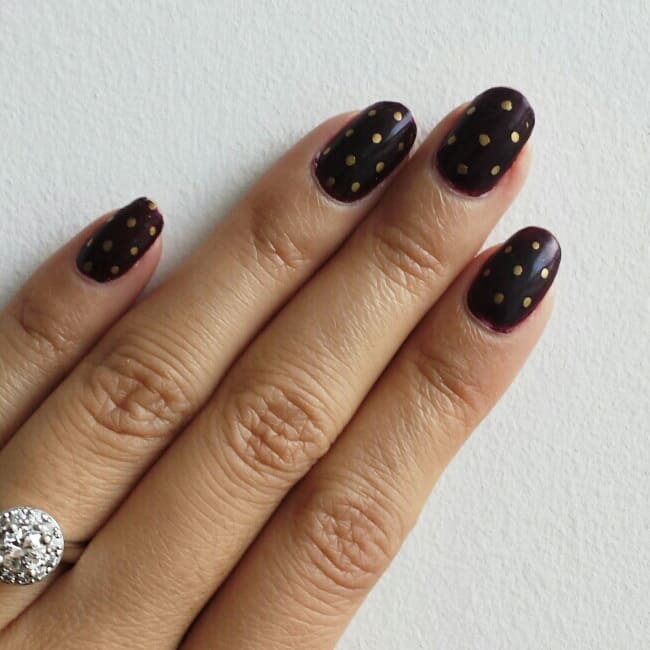
- To make perfect dots use the tip of the sharpie and hold your sharpie perpendicular to your nails.
- Start off my doing a of vertical line of dots down the middle of your nails. Then stagger the dots when you create the vertical line on your the left or right side.

- Use the polka dot method to create a grid on your nails. This will give you a guideline on where to make your lines.
- Heart Nail Art Design – No Nail Tools Required!
- Spring Flowers Nail Design
- How to Create Heart Nail Designs
- Easy Quilted Nail Art Pattern
- Make Your Own DIY Nail Appliques and Nail Stickers
- Starburst Nail Tutorial
- Movember Mustache Nails Tutorial
- Easy Peasy Sharpie Nail Art
- Minimal Nail Art – Easy Geometric Design
XOXO,


Cait
May 29, 2021Can you use the sharpie method when using gel polish? If so, would you put the sharpie directly on the nail or between a bottom & top coat?
Eileen
May 29, 2021I would put it before the top coat and make sure there is a bottom coat under the sharpie so you’re using it directly on your nails.
Whitney
October 24, 2014What about the smearing problem?? I read somewhere to use hairspray in between the sharpie and top coat but it still blurred my lovely design awfully!
May Chiu
February 8, 2014This is such a cool idea! Thanks for sharing 🙂
http://www.lavieenmay.blogspot.com
Emily @ TwoPurpleCouches
October 27, 2013I love these! The patterns are so cool! (and your ring is GORGEOUS!!)
Eileen
October 27, 2013Thanks Emily! I’m a lucky girl!